Deploy Smarter: Microsoft Connected Cache for Enterprise
In this blog post, I will take you through a recently released feature for Intune. Namely, Microsoft Connected Cache for Enterprise.
Microsoft Connected Cache for Enterprise is a software-only caching solution that distributes Microsoft content throughout enterprise and educational networks, which is, at the time of writing, currently in preview. Azure CLI or the Azure portal are the two ways to administer Connected Cache.
It can be set up on as many Linux (Ubuntu 22.04), Windows, or virtual machines as required. By using management tools like Microsoft Intune to apply the client policy, managed Windows devices can be set up to download cloud content from a Connected Cache server.
The Windows devices utilize Delivery Optimization when downloading cloud-managed content from the cache server that is set up on a Windows server or virtual machine. Among the categories of cloud-managed content are:
- Windows updates: Windows feature and quality updates
- Office Click-to-Run apps: Microsoft 365 Apps and updates
- Client apps: Intune, store apps, and updates
- Endpoint protection: Windows Defender definition updates
Check the Microsoft Connected Cache content and services endpoints page for a complete list of content endpoints supported by Microsoft Connected Cache for Enterprise.
How does caching works
An overview of Connected Cache's operation is shown in the diagram below:
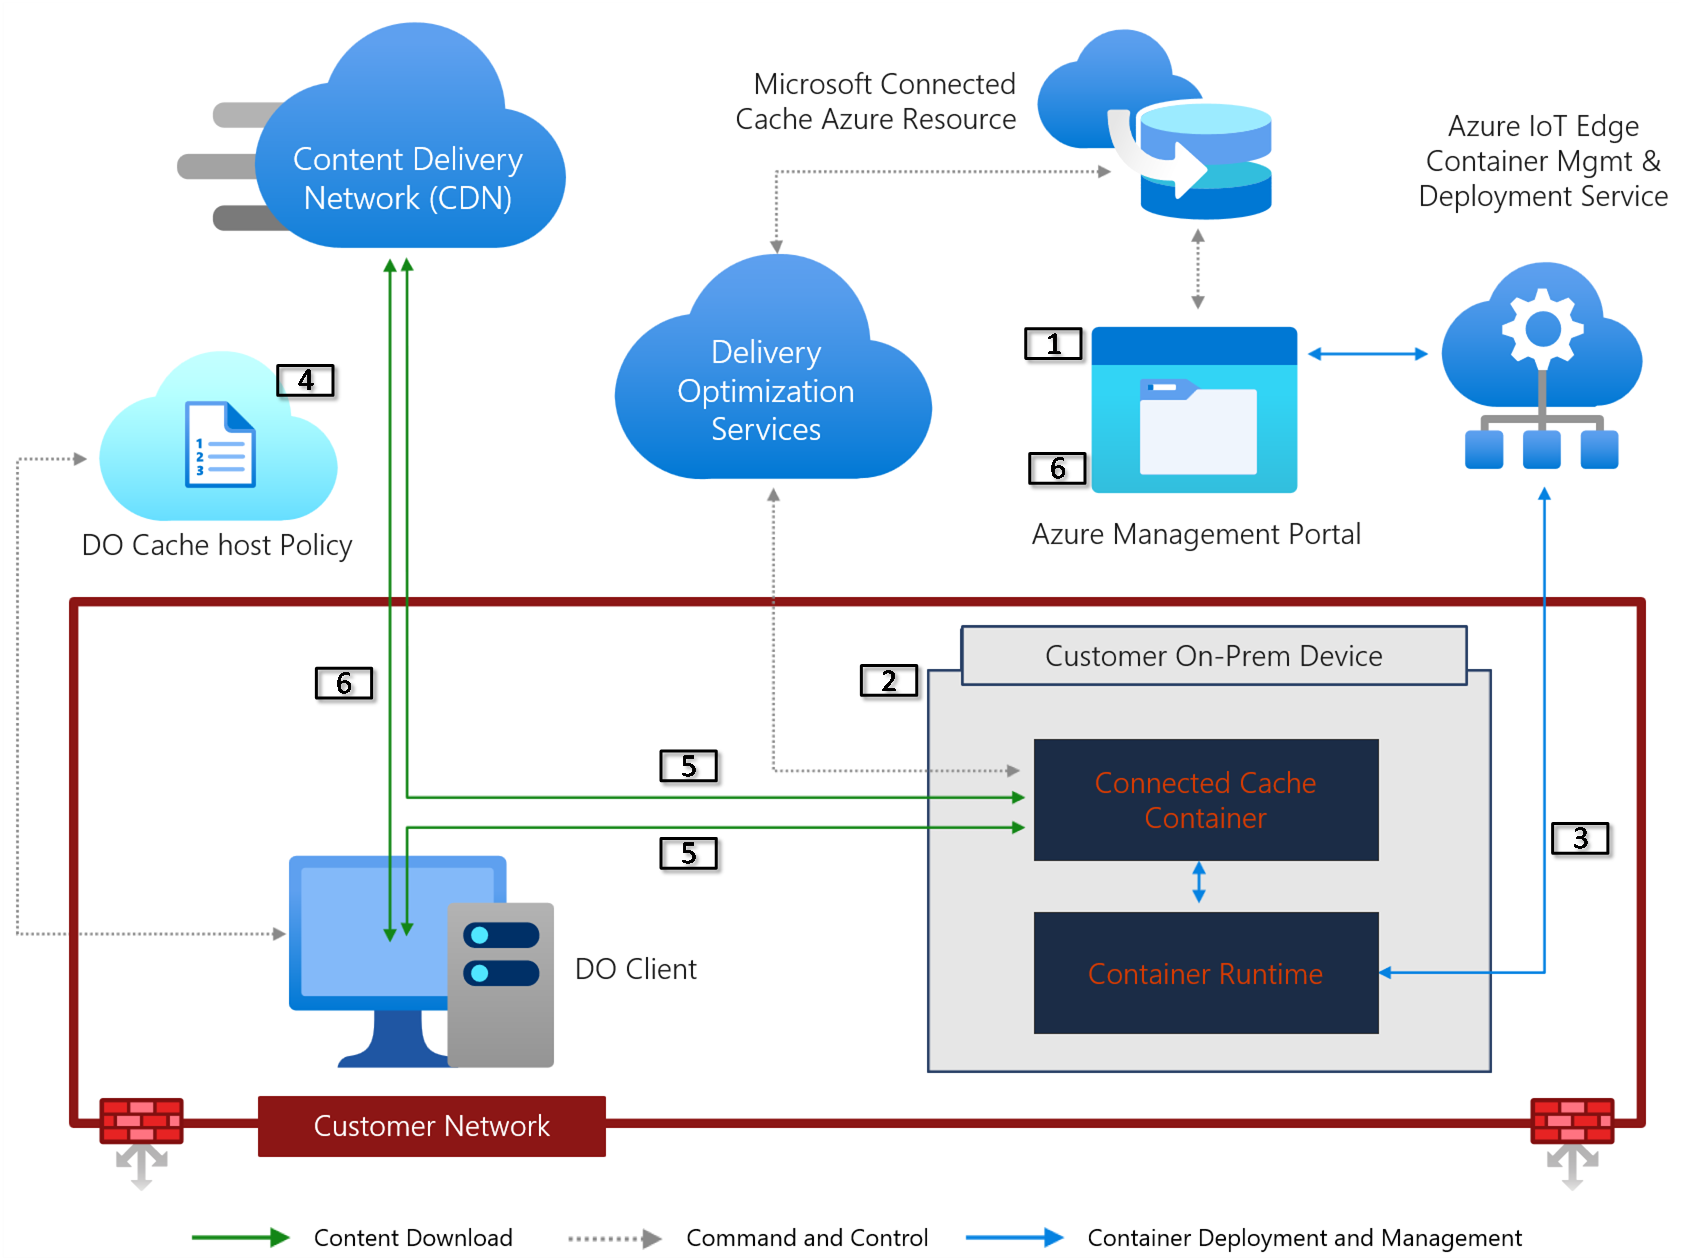
There are three steps required to configure Microsoft Connected Cache for Enterprise, namely:
- A VM running Ubuntu 22.04 (or 20.04) or Windows.
- Connected Cache configuration in Azure
- Configuration policy in Intune for Delivery Optimization
1. A virtual machine
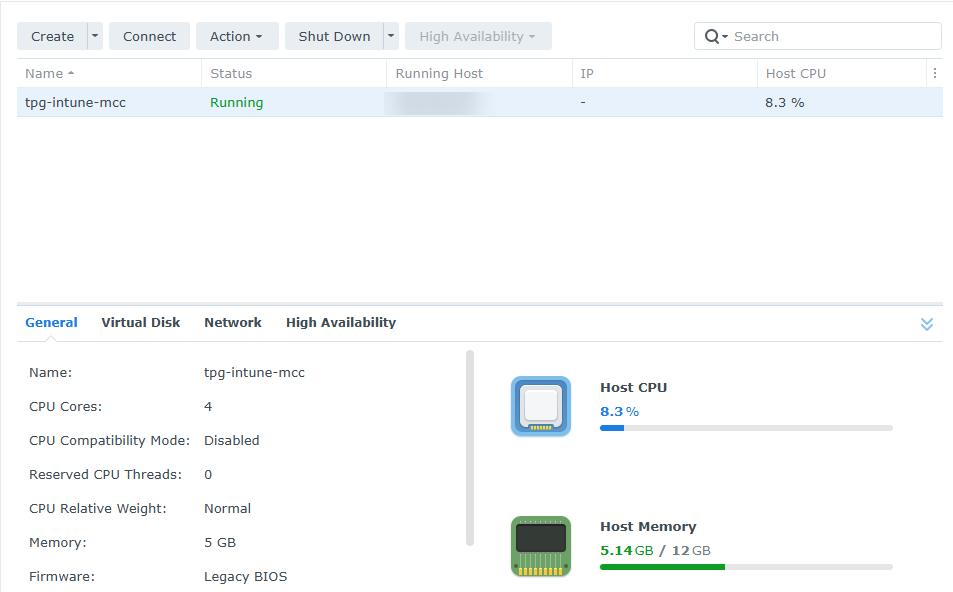
I created an Ubuntu 22.04 as a VM on my Synology NAS using the Synology Virtual Machine Manager. I connected this VM to my Homelab VLAN, which contains all my other physical Homelab devices. And the Hyper-V VM on my own laptop.
On this Ubuntu VM I created a folder called /mcc. Oh yes, the disk where the cache folder is on must be at least 50GB.
2. The Microsoft Connected Cache
Now that your VM is ready, let us continue in the Azure portal.
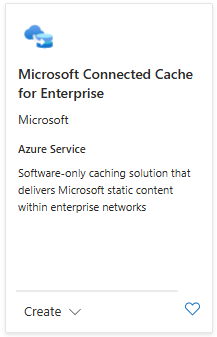
Under All Services, search for Connected Cache and click on Microsoft Connected Cache for Enterprise.
Click on Create and go through the steps, such as subscription, resource group, location and of course a name for your Connected Cache and then click on Review + Create and then on Create.
Child can do the laundry.
Once your Connected Cache is ready, go to the Cache Node Management > Cache Nodes. From here, click Create Cache Node. Give your Cache Node a name and choose Windows or Linux. Since I have an Ubuntu VM, I choose Linux here.
Once your Cache Node has been created, click on your Cache Node and enter your created cache folder at the Cache Storage. In my case /mcc and you also specify the cache size of that folder, 75GB. Click Save and go to step 2 Provisioning.
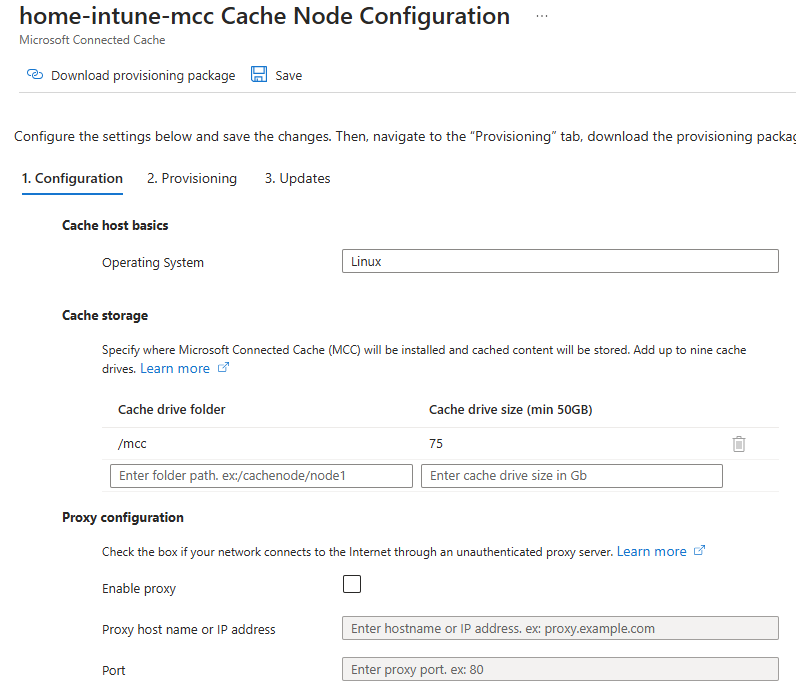
At Provisioning you will see a provisioning script. But first, you need to download the provisioning package to your VM. Once you've done that, copy/paste the script to the terminal and start the script.
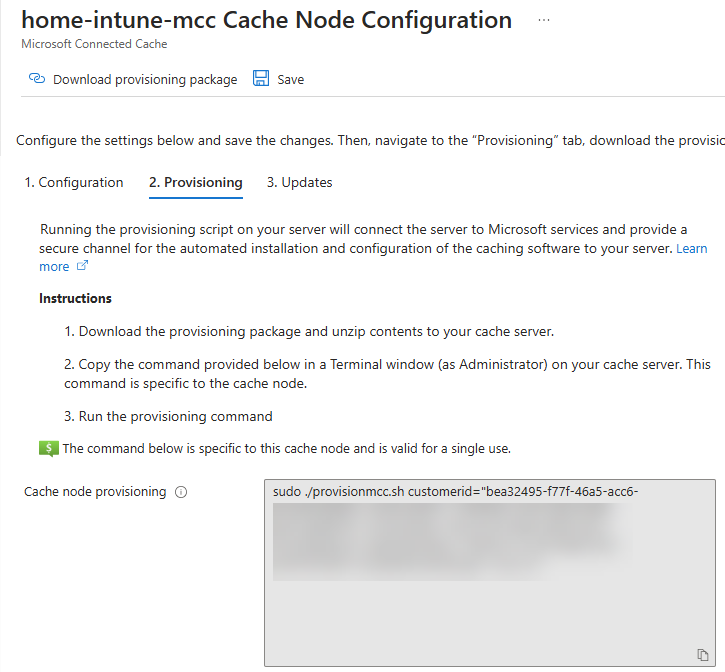
When you followed the steps above, your cache node will get the status Healthy whitin a few minutes.
Your Microsoft Connected Cache is ready to serve your clients.

3. Configure your Windows devices
Since we now have an Ubuntu VM and have configured our Connected Cache in Azure, it is now time to refer our clients to the Connected Cache to download the updates there. Of course, we do this with an Intune Configuration policy.
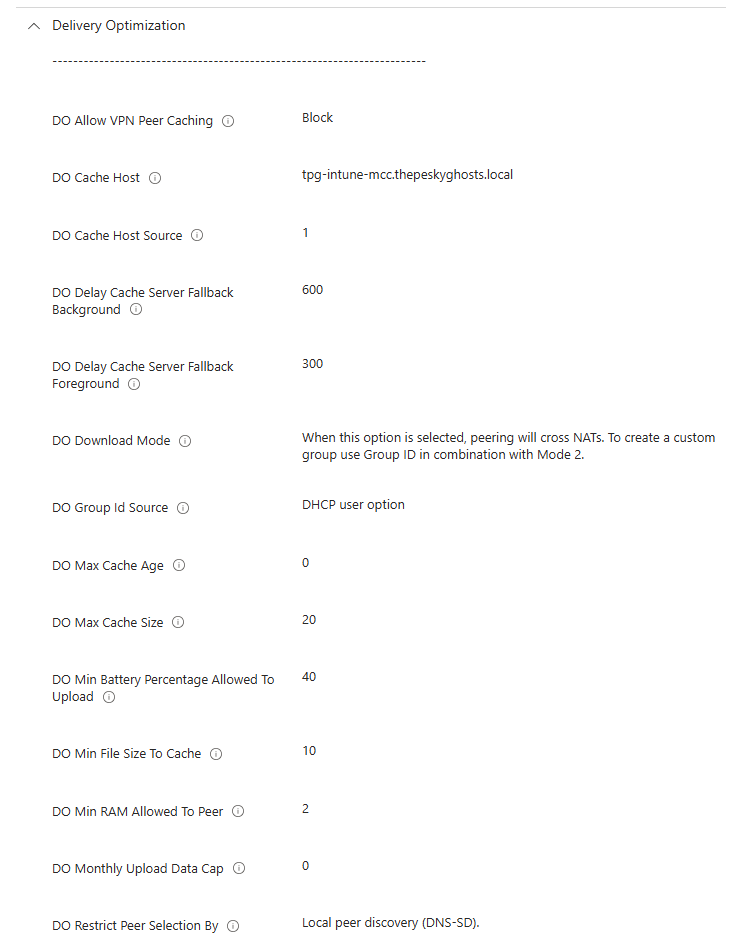
Create a new Settings Catalog policy and search for the Delivery Optimization settings. I have configured the following settings for my home lab.
| DO Allow VPN Peer Caching | Block | ||||||
| DO Cache Host | tpg-intune-mcc.thepeskyghosts.local | ||||||
| DO Cache Host Source | 1 | ||||||
| DO Delay Cache Server Fallback Background | 600 | ||||||
| DO Delay Cache Server Fallback Foreground | 300 | ||||||
| DO Download Mode | When this option is selected, peering will cross NATs. To create a custom group use Group ID in combination with Mode 2 | ||||||
| DO Group Id Source | DHCP user option | ||||||
| DO Max Cache Age | 0 | ||||||
| DO Max Cache Size | 20 | ||||||
| DO Min Battery Percentage Allowed To Upload | 40 | ||||||
| DO Min File Size To Cache | 10 | ||||||
| DO Min RAM Allowed To Peer | 2 | ||||||
| DO Monthly Upload Data Cap | 0 | ||||||
| DO Restrict Peer Selection By | Local peer discovery (DNS-SD |
The endresult
After a while, for example if it has been Patch Tuesday, you can see the Delivery Optimization in action on both the Connected Cache and the client, by means of graphs.
In the screenshots below, you will see some graphs from the Connected Cache resource and also from a Windows client.
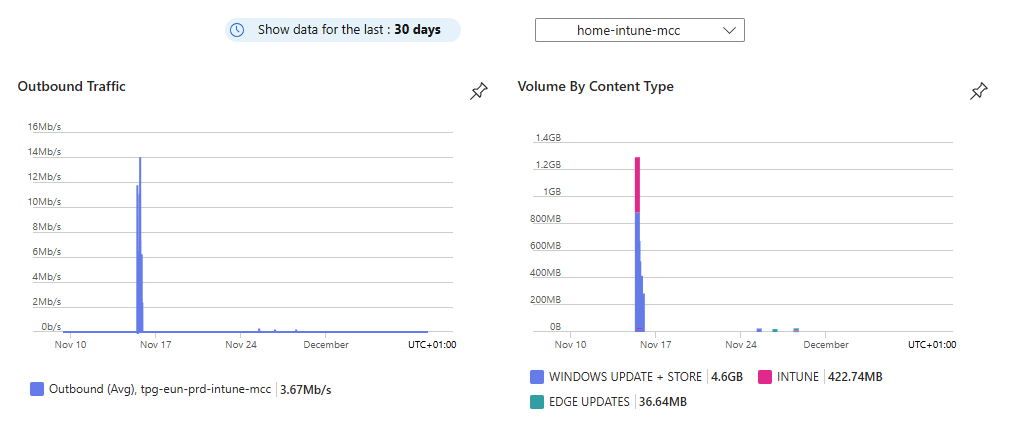

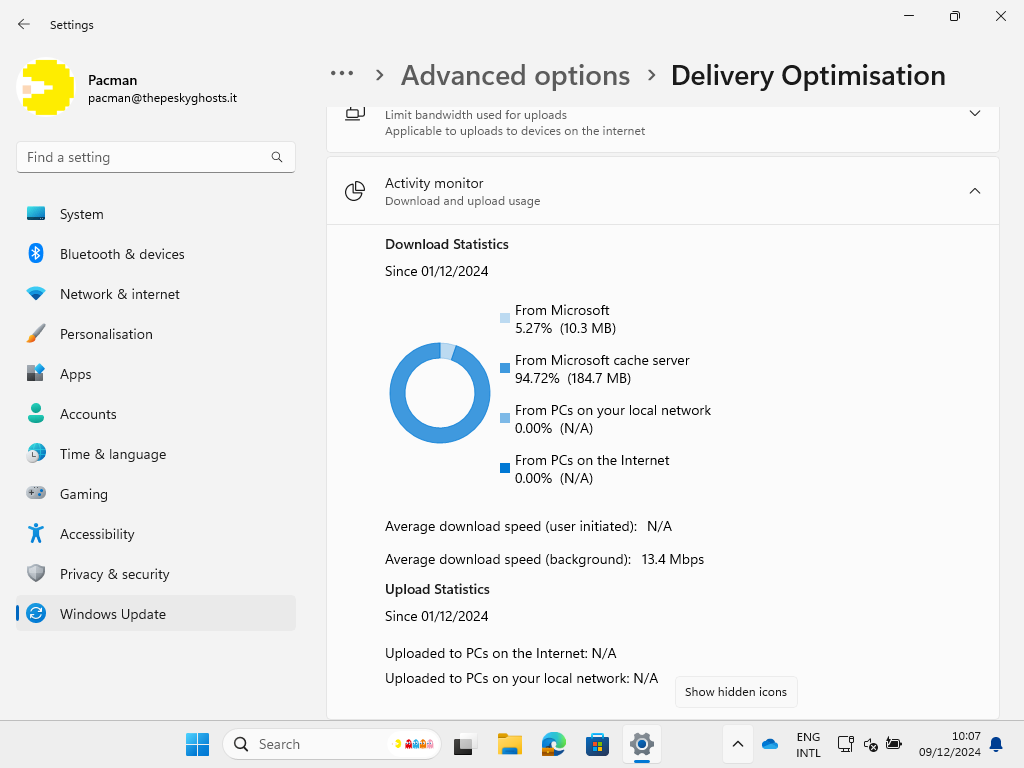
Figure 08 - DO Graphs and stats
Conclusion
In an environment where bandwidth can be a constraint, this is a workable solution. Instead of every device downloading its updates from the internet, this is now done via the caching node.
I even understood that caching also works well if you are going to roll out multiple Windows devices via Autopilot. I have not tested this myself yet.
The disadvantage is of course that you must have a virtual/physical machine in your network to support this form of caching.
That is it for now. Until next time. 👋