Gettings started with Microsoft Teams Rooms (Part 4)
It is time for part 4 of this series about Microsoft Teams Rooms.
In part 1, we have configured the MTR-account in Office365, assigned a Meeting Room license, created a resource mailbox with some optional parameters for automatic reply and so on, enabled Skype for Business (as a room) and set the password no not expire.
In part 2, we have installed an MTR in Hyper-V and installed the MTR software on the device. We also configured the MTR with the account settings from part 1.
In part 3, we connected the MTR with Intune to check some compliancy and to manage your Teams Room.
This series is divided in the following posts:
Part 1: Creating the Teams Room account and arrange the license
Part 2: Installing Microsoft Teams Room in Hyper-V
Part 3: Connect and manage it with Microsoft Endpoint Manager
Part 4: Customize the Microsoft Teams Room
Part 5: ?
You can find the files, scripts and other stuff that I have used in this series on my GitHub page at https://github.com/BurgerhoutJ/scripts/tree/main/microsoft-teams-rooms.
Part 4: Customize the Microsoft Teams Room
In this part of the series, we are going to customize your MTR with for example a custom theme that suits your organization. I will show you also, how you can manage some basic settings with the help of the Teams Admin Center.
What do we need?
You must have the following:
- A custom background
- Access to Endpoint Manager and Teams Admin Center
Create an XML config file
To customize your MTR, you need to create an XML file, called SkypeSettings.xml. We did this already in part 2. With this XML file, you can customize many things, like default external devices to use, like microphones and cameras. You can configure to send logs to an email address, and much more settings. In the Resources section, you will find the link to all the settings that you can configure.
For this blog post, we are going to concentrate to the following XML configuration:
<SkypeSettings>
	<Theming>
		<ThemeName>Custom</ThemeName>
        <CustomThemeImageUrl>CustomBackgroundTheme.png</CustomThemeImageUrl>
        <CustomThemeColor>
		<RedComponent>249</RedComponent>
        	<GreenComponent>148</GreenComponent>
		<BlueComponent>59</BlueComponent>
        </CustomThemeColor>
	</Theming>
</SkypeSettings>
Custom Theme
Before you begin with your custom theme, please note of the following prerequisites:
- Image must be exactly 3840x1080 pixels
- Must be a jpg, jpeg, png or bmp file format
- A graphic designer can use the provided Photoshop template
The image can be used for dual screen setup. So, keep in mind that you can divide your image in a left and right section. I created one big image, and this is for testing only. Maybe I am going to setup a NUC with dual screen for a result.

Nice feature that I found on the internet, is from @patrichard. He created a PowerShell script that change your background image every day. Link to his blogpost is available in the Resources section.
XML file configuration
Now we have a custom image, and we need to store it on a central space, so your MTR can access it. I will put it on my website. Let us look at the XML configuration file.
<SkypeSettings>
	<Theming>
		<ThemeName>Custom</ThemeName>
        <CustomThemeImageUrl>CustomBackgroundTheme.png</CustomThemeImageUrl>
        <CustomThemeColor>
		<RedComponent>249</RedComponent>
        	<GreenComponent>148</GreenComponent>
		<BlueComponent>59</BlueComponent>
        </CustomThemeColor>
	</Theming>
</SkypeSettings>
Save the above XML as SkypeSettings.xml and store this file on the same location as your image.
Creating the PowerShell script
Right now, we have a custom image, an XML file with the settings. But how can we configure the MTR so that he is going to use your custom theme.
To do this, we need a PowerShell script and Microsoft Endpoint Manager.
Thanks to Thomas Eklund, we can use his PowerShell script and do some modifications to it.
$WebClient = New-Object System.Net.WebClient
$WebClient.DownloadFile("https://yourdomain.com/CustomBackgroundTheme.png","C:\Users\Skype\AppData\Local\Packages\Microsoft.SkypeRoomSystem_8wekyb3d8bbwe\LocalState\CustomBackgroundTheme.png")
$WebClient = New-Object System.Net.WebClient
$WebClient.DownloadFile("https://yourdomain.com/SkypeSettings.xml","C:\Users\Skype\AppData\Local\Packages\Microsoft.SkypeRoomSystem_8wekyb3d8bbwe\LocalState\SkypeSettings.xml")
if (-not (Test-Path -LiteralPath 'c:\temp')) {
        New-Item -Path 'c:\temp' -ItemType Directory
        }
else {
    "Directory already existed"
}
The above PowerShell script will download the image and the xml file and place it in the correct folder. Save the PowerShell script.
Microsoft Endpoint Manager
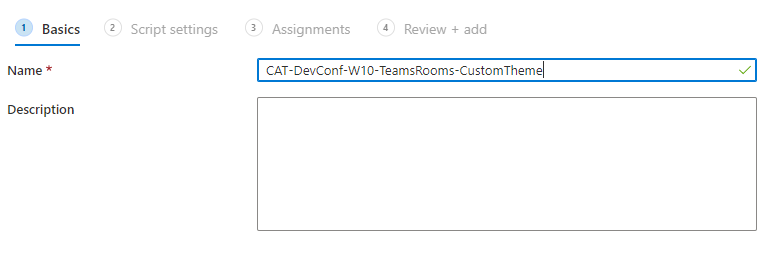
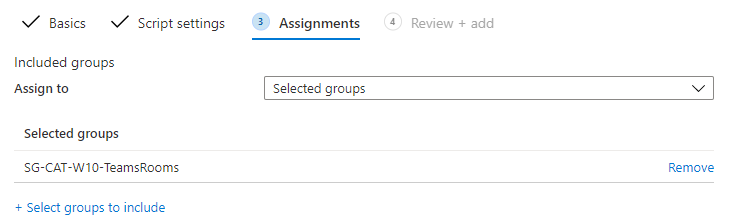
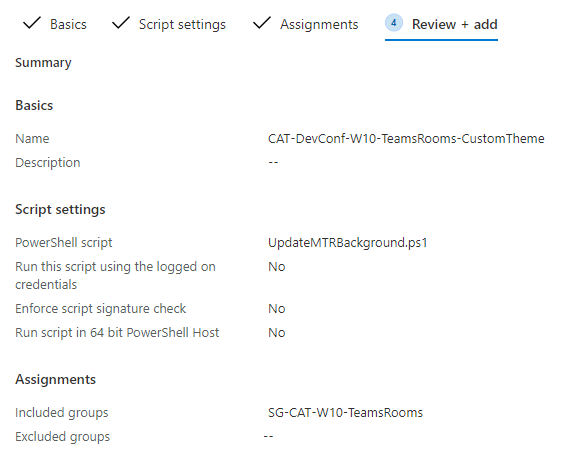
Open your MEM portal, logon and go to Devices -> Windows -> PowerShell scripts.
- Click on + Add
- Give it a name and click Next
- Browse to your PowerShell script and click Next

- Assing the script to your MTR AzureAD group and click Next
- Review your settings and click on Add
And now we must wait until the MTR is contacting Intune and execute the PowerShell script.
….2 hours later….
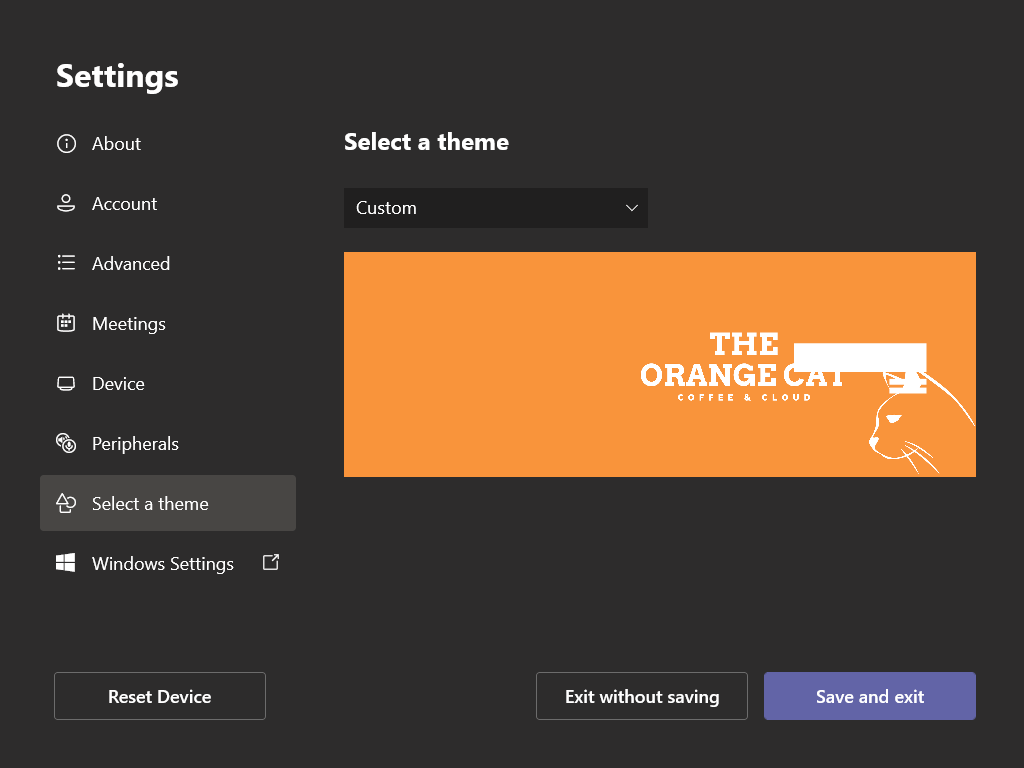
My MTR has received the PowerShell script and the new custom-made theme, as shown in the screenshot below.
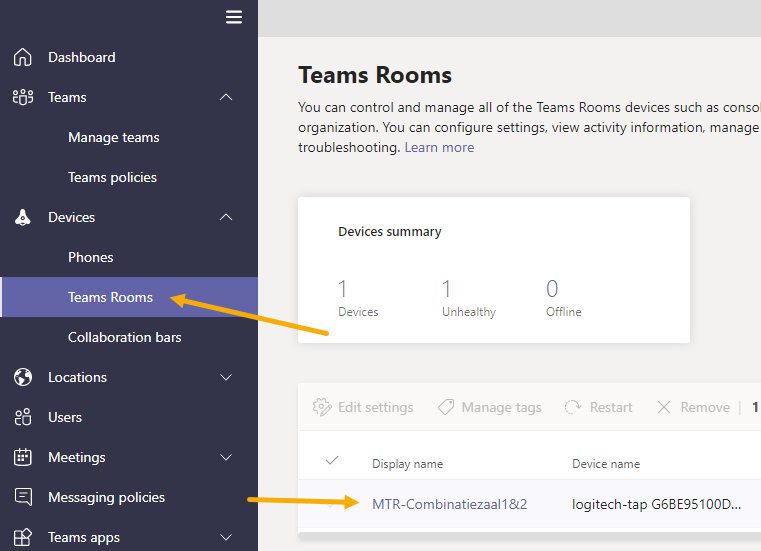
Of course, you can configure many things with the SkypeSettings.xml file, but nowadays you can manage your MTR with the Teams Admin Center. In the following screenshot, you see a Teams Room device in the TAC.
Hope you liked this part of my series. If you have some ideas for part 5, then let me know.
For now, have a good day.
Resources
-
https://docs.microsoft.com/en-us/microsoftteams/rooms/xml-config-file#custom-theme-images
-
https://www.linkedin.com/pulse/modern-deployment-teams-meeting-room-settings-thomas-eklund/
-
https://docs.microsoft.com/en-US/microsoftteams/rooms/rooms-manage