Hyper-V Server 2019 Shielded VMs issues
Recently I brought back life in to one of my old NUCs to install Hyper-V Server 2019. That was the easy part. 😊
But today I wanted to “migrate” VMs from my desktop-NUC to the newly Hyper-V server. So, I made an export of the VM, copied it over to the Hyper-V NUC, did an import of the VM. So far, so good.
Then I clicked on the icon to start the VM and within one second, an error message popped up, with a message about the Host Guardian Service.
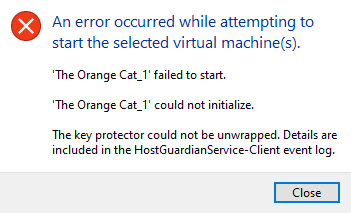
After doing research, I found out that the VMs on my desktop-NUC are shielded through a certificate and I had to export the certificates belonging to the shielded VM and import them on the Hyper-V server. After I did this, the VM could start again.
What exactly have I done? Let us start!
Presume that you already have exported your VM(s) and copied it over to the Hyper-V server, we going to start right away with the certificates.
Exporting the certificates
First, you need to export the certificates that are in the “Shielded VM Local Certificates” certificate store on your machine. We can do this by using an elevated prompt.

- Type
certutil -store “Shielded VM Local Certificates”
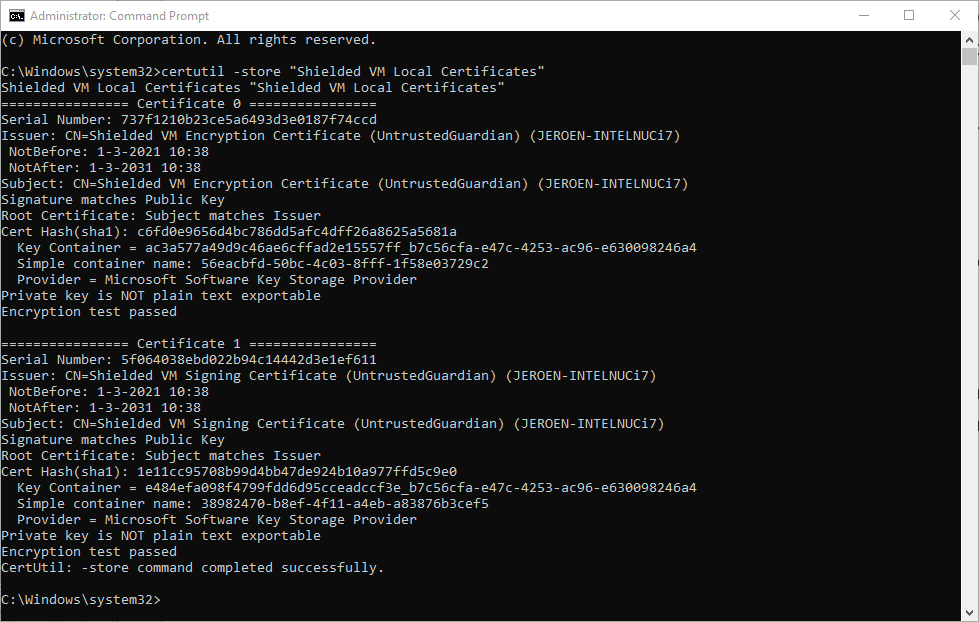
- In the cmd window, find the serial numbers for both certificates.
- Type
certutil -exportpfx -p “SuperDuperPassword!” “Shielded VM Local Certificates” 737f1210b23ce5a6493d3e0187f74ccd C:\Temp\ShieldedVMEncryption.pfx - Type
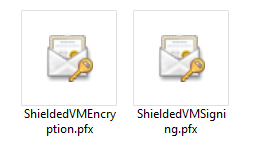
certutil -exportpfx -p “SuperDuperPassword!” “Shielded VM Local Certificates” 5f064038ebd022b94c14442d3e1ef611 C:\Temp\ShieldedVMSigning.pfx - At this moment you should have two exported certificates in the C:\Temp folder.
Importing the certificates
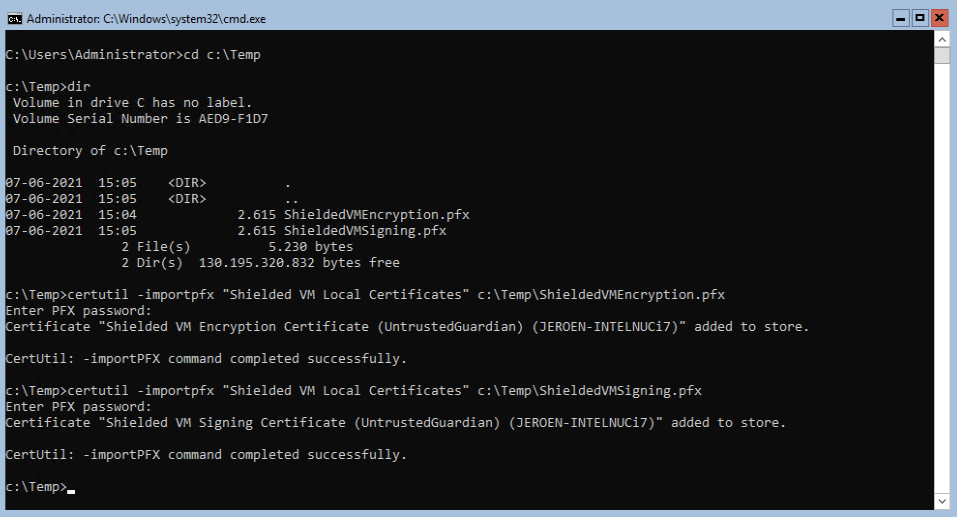
- Copy both files to your Hyper-V server.
- Switch over to your Hyper-V server and open the command prompt.
- Type
certutil -importpfx "Shielded VM Local Certificates" c:\Temp\ShieldedVMEncryption.pfx - Type your password and the certificate is in the certificate store.
- Type
certutil -importpfx "Shielded VM Local Certificates" c:\Temp\ShieldedVMSigning.pfx - Type your password and also this certificate is in the certificate store.
- If you open the certificate store of the Hyper-V server, you will see four certificates. Two of your Hyper-V server and the two imported certificates of your machine.

Start your imported VM
After you followed the above steps, you can start your virtual machine on your Hyper-V Server 2019.